Explaining Pad Printing
Open Inkwell System

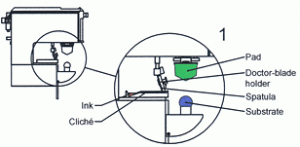
Through these diagrams we will explain how pad printing works with an open inkwell system.  A complete cycle is explained here step-by-step to provide better insight into the pad printing techniques.

Open Inkwell
0

The starting point. In this position, the cliché is covered with ink that is in the inkwell. The image in the cliché is filled with ink after the spatula moves forward depositing ink across the entire plate. The depth of the cliché image is carefully engraved to approximately 25 microns.

0

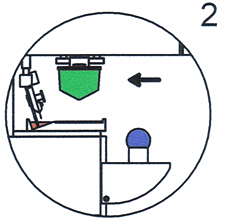
The pad and the doctorblade holder with the doctorblade move back. The doctorblade scrapes all the excess ink backwards. From the moment ink is left in the recessed image area of the cliché, the outside air begins to evaporate making the top layer of the ink tacky. This tacky ink is important and is relied upon by the pad to pull the ink from the recessed image.

0

The pad moves up and pulls the ink off the cliché. From that moment on, the bottom of the ink layer is now exposed to the air becoming tacky. Now, as in step 2, the thinner begins to evaporate from that side of the image.

0

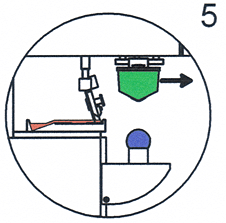
At the same time the pad is moving forward to get into the position to deposit the image onto the part, the doctorblade holder and spatula move forward, once again filling the cliche and the recessed image with the ink to print on the part. The pad is now above the product to be printed.

0

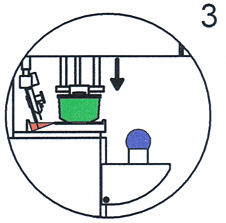
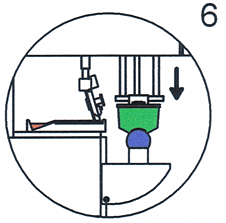
The pad moves downwards and presses onto the product. The ink is transferred from the pad to the product. The force with which the printing is done is not important for the transfer of the ink. The mere touch of the pad ensures transfer. At this step, the lowest possible pressure is necessary to prevent deformation.

0

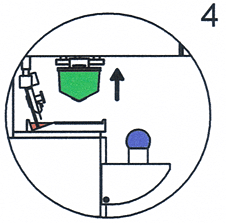
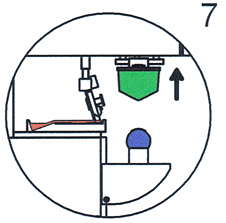
The pad moves back up to the starting position. The pad printing machine is now ready for the next cycle. This entire process from steps 1-7, is measured in mere seconds.